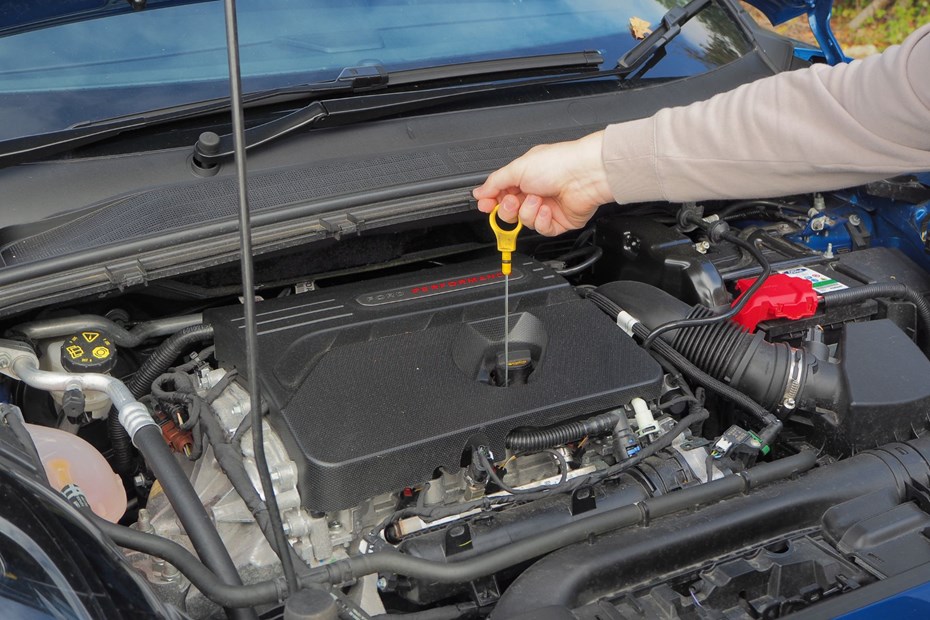
Getting ready for a holiday road trip? Keeping your car in top shape doesn’t have to mean endless trips to the garage. With a few simple checks you can do at home, you’ll reduce the risk of breakdowns and travel with peace of mind. From inspecting your tyres, battery, and oil levels to topping up coolant and washer fluid, our guide shows you how to prepare your car for hassle-free holiday journeys, whether you’re a new driver or a seasoned road tripper.
For those feeling ambitious, we’ve also included tips on headlights. These simple steps will help you keep your car running smoothly and save you time and money in the long run.
Tyres
Often overlooked but absolutely vital to your car’s safety and performance, tyres are like a good pair of shoes — essential for getting you where you need to go. While they’re important all year round, they become even more critical during the colder months when wet, icy, or snowy roads put extra demands on them. Opting for winter tyres or all-season tyres during this time can enhance grip and handling, ensuring your car stays safe and responsive in harsher weather conditions.
There are three simple but essential checks to keep your tyres in top condition: condition, tread depth, and tyre pressure.
- Inspect the tyres: Check for any scrapes, tears, or significant damage to ensure they’re in good condition.
- Measure tread depth: The legal minimum is 1.6mm, but for safety, replace tyres worn below 3mm. You can use tools like a digital gauge or the AA’s Tyre Safety Kit, which also includes a tyre pressure gauge.
- Check tyre pressure: Use a small tyre inflator or a foot pump to ensure your tyres are properly inflated.
Car battery
Under the bonnet, your car’s battery is also something that you can keep healthy without much hassle, just the willingness to remember that it needs checking every so often. Apart from new batteries usually being pricey, having a flat battery is incredibly irritating. Therefore, keeping car batteries in good condition saves money and frustration. For the same reason, it’s worth investing in a quality battery charger.
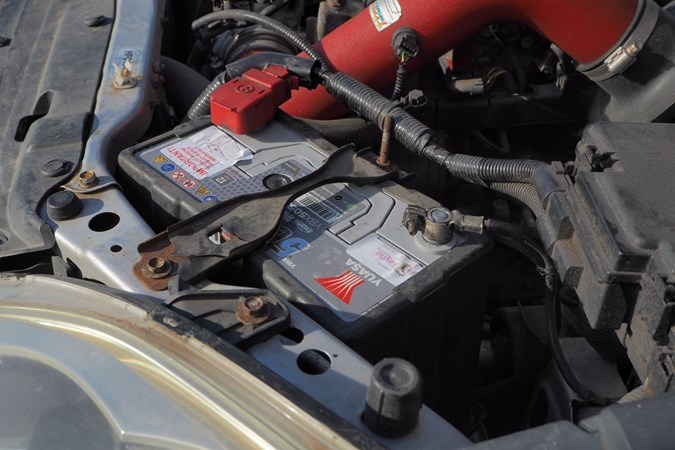
- Check the connections: Make sure the battery terminals are secure and free from corrosion. Use a torch to check for bubbling, dried liquid, or a sulphuric smell—signs of a potential leak.
- Test the voltage: Use a multimeter or a battery tester to check its charge. A healthy battery should typically read around 12.6 volts when the engine is off.
- Inspect for damage: Look for cracks or leaks in the battery casing which can sometimes suggest overcharging. If you spot any damage, replace the battery immediately or consult a professional to avoid further issues.
Oil
Checking and changing oil is basic car maintenance but one that is apparently overlooked more than tyres. The RAC says one in three cars that they inspect when on patrol have worryingly low oil levels. Because of that, try to check the oil level at least every couple of weeks and especially prior to a long drive.
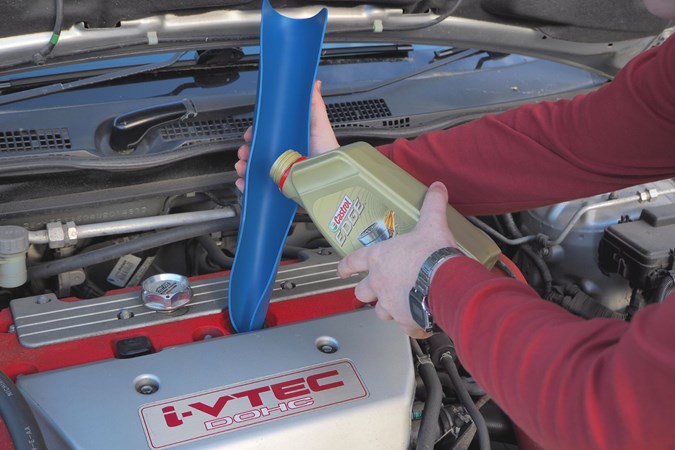
- Check the oil level regularly: Use the dipstick to check the level when the engine is cold and the car is on a flat surface. Ensure it’s between the minimum and maximum markers.
- Look for warning signs: If your dashboard oil light comes on or you notice unusual engine noise, address it immediately — it could be a sign of low oil pressure.
- Inspect the oil’s condition: Check the colour and texture of the oil. Fresh oil is amber and smooth, while old or contaminated oil may look dark and gritty.
- Stick to oil change intervals: Even if it’s not running low, oil degrades over time. Follow your manufacturer’s recommended schedule for oil changes to keep the engine running smoothly.
Coolant
Like oil, checking your car’s coolant level is a quick and straightforward task that doesn’t require any special tools — just a bit of attention. It plays a vital role in preventing your engine from overheating in the summer or freezing in the winter, so keeping it at the right level is crucial. Coolant needs to have low viscosity (resistance to changing shape) and a high thermal capacity to be effective.
- Check the coolant level: Look at the reservoir when the engine is cold. It should be between the ‘min’ and ‘max’ markers. If it’s low, consult your owner’s manual for the correct type of coolant to use.
- Look for issues: Use a torch to inspect the coolant for any signs of leaks, such as puddles under the car, or discoloration, which could indicate contamination or old coolant that needs replacing.
- Check the cap: Ensure the reservoir cap is tightly secured and free from cracks or damage. A faulty cap can lead to pressure loss and overheating.
- Top up if needed: If the coolant is low, refer to your car’s manual to identify the correct type. Carefully add it to the reservoir, avoiding spills. Never open the reservoir when the engine is hot — it can release scalding steam.
Washer fluid and windscreen wipers
Washer fluid
Washer fluid might seem like a small detail, but it’s essential for clear visibility, especially in bad weather or on long drives. The good news is that it’s one of the easiest checks you can do at home — it doesn’t require any special tools or much know-how. Running out when you need it most can quickly turn into a safety issue, so it’s important to keep it topped up and in good condition.
- Locate the Reservoir: Pop the bonnet and find the washer fluid reservoir. It usually has a clear plastic container with a cap marked by a windscreen symbol.
- Check the Level: Most reservoirs are semi-transparent, so you can easily see if the fluid level is low. If it’s not visible, it’s time for a refill.
- Top up with the right mix: Use a ready-made washer fluid or dilute concentrate according to the instructions. Avoid plain water, as it can freeze in winter or fail to clean effectively.
- Inspect for dirt or clogs: While refilling, check for any blockages or grime around the nozzle or the reservoir cap. Clearing debris helps maintain a strong spray.
- Don’t overfill: Pour the fluid in slowly, and stop before the reservoir is full to avoid spillage.
Wiper blades
With your washer fluid topped up, check the windscreen wipers are good condition. Give them a visual inspection to make sure the wiper blades are free from cracks or splits. Then test them by spraying washer fluid on the windscreen to see the wipers clear the windscreen properly.
- Inspect for damage: Look for any cracks, splits, or frayed edges on the rubber. Damaged blades won’t clear the windscreen properly.
- Test their effectiveness: Spray washer fluid and watch how well the wipers clear the screen. Streaks or missed spots? Time for a replacement.
- Replace if needed: Most blades can be removed by unhooking or sliding them from the bracket. Fitting new ones is just as easy — reverse the process.
Headlights
Cover restoration
Headlight maintenance has two main aspects: keeping the plastic headlight covers clear and replacing the bulbs when needed.

- Inspect for damage: Check if your headlights are hazy, yellowed, or cloudy. This is usually caused by UV damage over time.
- Prepare for restoration: Gather a headlight restoration kit, which typically includes sandpaper, polish, and a sealant.
- Restore the clarity: Sand off the damaged top layer of the headlight to remove haze, then apply a polish to bring back the crystal-clear finish.
- Protect your work: Use the sealant provided to protect the restored surface from further UV damage.
For a step-by-step walkthrough, check out our full guide on how to restore headlights. It’s an easy way to give your car a fresh, brighter look and improve visibility at night.
Bulbs
Replacing headlight bulbs depends heavily on the model of car. Cars that use the latest LED technology cannot be replaced by you and have to be done professionally. Whereas halogen bulbs (the most common) and some xenon ones can be replaced by you.
- Access the bulb: Locate the plastic cover at the back of the headlight in the engine bay. Carefully remove it to access the bulb.
- Replace the bulb: Unclip the old bulb and secure the new one in place. Be cautious not to touch the glass on the new bulb — oils from your skin can shorten its lifespan.
- Test your headlights: Once replaced, switch on the headlights to ensure they’re working correctly before closing the cover.
Headlight bulbs have various fitting types as well, so this is another thing you will need to check in your car’s manual, H7 is the most common.
Filters
Air filter
Engine and cabin air filters play a vital role in keeping your car running smoothly and your interior comfortable. Over time, these filters can become clogged with debris, reducing engine performance, fuel efficiency, or even the quality of air inside your car. That’s why mechanics recommend replacing them every 12 months or 12,000 miles, whichever comes first.
While they’re both relatively simple to replace, the process can vary depending on the type of filter and your specific car. To help, we’ve put together a guide that covers the different types of air filters, how to choose the right one, and step-by-step instructions for replacing them.
Oil filters
Oil filters can be replaced at home too. These are quite good to replace for no reason other than the fact you can get oil-covered hands and feel very accomplished. Though, of course, oil filters perform a very important job of keeping the oil system free of damaging particles. Every so often they need changing.
Oil filters vary by car, not just in type but also in location. Some are accessible from the engine bay, while others require access from underneath the car. To get started, check your car’s manual to find your oil filter’s location and identify the right replacement filter and removal tool.
The process involves draining the old oil by loosening the drain plug, carefully removing the old filter, and replacing it with a new one. Don’t forget to lubricate the gasket on the new filter before fitting it securely. Once the filter is in place, refill your engine with fresh oil.
For a step-by-step guide and detailed instructions, check out our how to change your oil filter article.
Sign up to the Parkers Newsletter to keep up to date with more of the latest reviews, news, and recommendations from the Parkers team.
Just so you know, we may receive a commission or other compensation from the links on this website - read why you should trust us.


